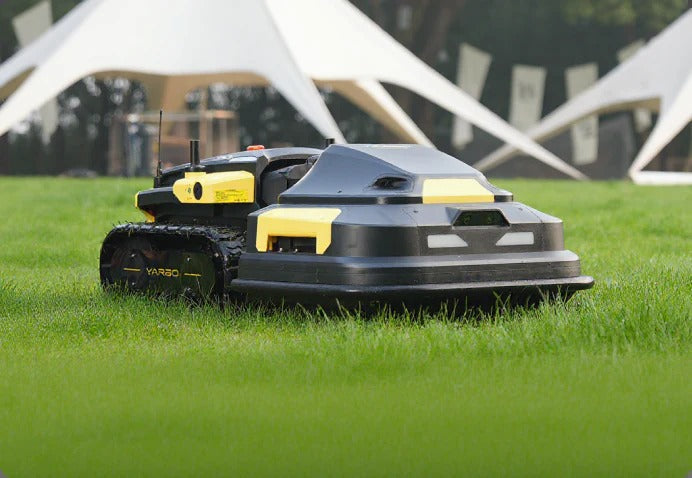
If you’ve ever wondered how to get those eye-catching stripes across a lawn like the ones on golf courses or baseball fields using a lawn striping kit, you’re not alone. Thanks to modern mowing tools and smart guidance systems, even homeowners with large or complex yards can achieve clean, professional-looking lawn stripes without extra effort.
Lawn stripes are created by bending grass blades in opposite directions so they reflect sunlight differently. With the right lawn striping kit, mower settings, and approach, anyone can create crisp lawn stripes that dramatically enhance curb appeal. Whether you’re using a rotary mower, a striping attachment, or an autonomous mower like Yarbo, this guide shows you exactly how to stripe a lawn step by step.
What You Need to With a Lawn Striping Kit?
Using a dedicated lawn striping kit helps bend the grass consistently, giving your stripes a sharper and more defined appearance.
Essential Tools and Equipment

To create crisp, professional-looking stripes, you’ll need:
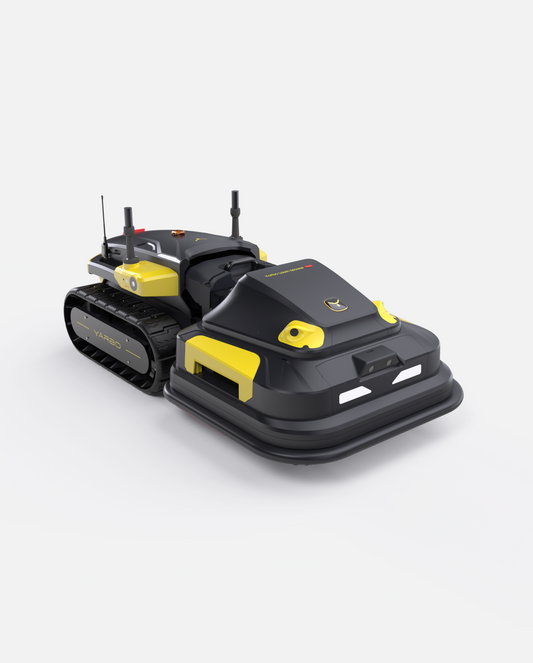
Pro tips: For unparalleled precision and ease, consider advanced robotic mowers like the Yarbo Lawn Mower, which boasts dual cutting decks and adjustable height settings crucial for achieving crisp lines.
Choosing the Right Mower and Roller

Preparing Your Lawn for Striping
Proper Lawn Maintenance
-
Ensure your lawn is healthy, well-watered, and fertilized.
-
To get your lawn ready for stripes, you can follow our step by step guide to get your lawn ready.
-
Remove debris and level uneven spots before mowing.
-
Follow our seasonal lawn care guide to maintain grass health.

Automated solutions like Yarbo are designed to optimize mowing conditions, contributing to cleaner, more even cuts, and can be scheduled to operate when grass is dry for best results.
Ideal Grass Length for Striping
-
The best grass height for striping is 2.5 to 4 inches.
-
- Taller grass bends more easily, creating a stronger contrast.
Choosing the Best Grass Types for Making Stripes in Lawn
-
Great for striping:
-
Kentucky Bluegrass
-
Perennial Ryegrass
-
Fescue varieties
-
Difficult to stripe:
-
Bermuda
-
Zoysia
-
St. Augustine
Mowing Best Practices
-
Always mow when the grass is dry for clean, even cuts.
-
Use sharp mower blades to prevent tearing the grass.
-
- Avoid working on your lawn during the hottest time of the day.
Understanding How To Get Stripes on Lawn
How Light Reflection Creates Lawn Stripes

Automated solutions like Yarbo are designed to optimize mowing conditions, contributing to cleaner, more even cuts, and can be scheduled to operate when grass is dry for best results.
How Wide Should Lawn Stripes Be?
-
Standard width: 18 to 24 inches for most lawns.
-
Narrower stripes (12–16 inches) suit smaller lawns.
-
Wider stripes (24–36 inches) look best on large yards.
Step-by-Step Guide to Lawn Striping kit
Step 1: Measure and Plan Your Stripes
-
Choose your pattern and use chalk or rope as a guide.
-
Mark precise straight lines as this will impact the outcome and overall look of the lawn.
-
Ensure each stripe is evenly spaced for uniformity.

Make sure to take your time ensuring your lines are straight and evenly spaced. This attention to detail will determine how professional and polished your lawn looks.
Step 2: Mow in Straight Lines
-
Start from a fixed point like a driveway or sidewalk.
-
For the best visual effect, mow your stripes from north to south because the sun rises in the east and sets in the west. This positioning ensures that sunlight hits the grass at an optimal angle, enhancing the contrast between light and dark stripes. The difference in how the grass reflects sunlight makes the stripes stand out more clearly, giving your lawn a bold and professional look.
-
Move in a straight path and mow at a steady speed.
-
Alternate the direction of each stripe—if the first pass is from top to bottom, the next should be bottom to top, then repeat the pattern for a uniform look.
Tips to Keep Lawn Stripes Straight
While traditional methods rely on chalk or rope, modern autonomous mowers like Yarbo utilize RTK-GPS navigation for centimeter-level precision and smart path planning, ensuring perfectly straight and evenly spaced lines across your lawn without manual effort, even in complex multi-zone properties.
Step 3: Use a Lawn Roller or Striping Kit
After mowing, use a lawn roller to enhance the striping effect by bending the grass blades further in the desired direction. A roller helps create deeper contrast between light and dark stripes, making the pattern more defined and professional-looking.
Benefits of Using a Roller:
-
Amplifies contrast for bold stripes.
-
Helps train grass to lay in desired direction.
-
Reduces mowing frequency needed to maintain pattern.
Expert Tips:
-
Use water- or sand-filled rollers for adjustable weight.
-
Avoid over-rolling to prevent soil compaction.
-
Roll right after mowing to "lock in" the effect.
Yarbo offers modular striping kit options that seamlessly integrate with its Core unit, automatically enhancing stripe contrast as it mows. This built-in capability amplifies the striping effect, contributing to a professional, polished look similar to golf courses and stadiums, and helps train grass to lay in the desired direction over time.
How to Use a Lawn Roller for Striping
-
Attach or Push the Roller – If using a striping kit, it will naturally roll as you mow. For a separate roller, push or pull it along the stripes after mowing.
-
Follow the Mowed Lines – Go over the same paths you mowed, applying even pressure to bend the grass in the correct direction.
-
Use Gentle Pressure – Avoid pressing too hard, as excessive force can stress or damage the grass. A light but firm pass is enough to reinforce the pattern.
-
Roll When Grass is Dry – Rolling works best on dry grass; wet grass may flatten unevenly or get damaged.
Benefits of Using a Lawn Roller for Striping
-
Enhances the stripe contrast by bending the grass more effectively.
-
Gives a professional, polished look similar to golf courses and stadiums.
-
Helps train grass to grow in the striped pattern over time.
-
Reduces the need for frequent mowing to maintain the effect.
Expert Tips for Lawn Rolling
-
Use a water-filled or sand-filled roller for adjustable weight, allowing better control.
-
Avoid rolling too often to prevent soil compaction, which can harm grass roots.
-
Experiment with different rolling directions to create unique patterns like checkerboards or diagonals.
-
Roll immediately after mowing to lock in the stripes while the grass is freshly cut.
By incorporating a lawn roller into your striping routine, you can achieve sharper, more defined patterns that last longer and give your lawn a stunning, professional appearance.
How Wide Should Lawn Stripes on Lawn Be?
Standard Width for Lawn Stripes
Adjusting Width Based on Lawn Size
-
For small yards, use narrower stripes (12-16 inches) to avoid overwhelming the space.
-
For large lawns, use wider stripes (24-36 inches) for a grander effect.
Tips to Keep Lawn Stripes Straight
-
Use a landmark (driveway, fence, or straight path) as a reference.
-
Mow at a steady pace to maintain even striping.
-
Overlap each row slightly to avoid gaps between stripes.
Mistakes to Avoid When Striping Your Lawn
-
Uneven mowing – leads to messy patterns.
-
Cutting too short – prevents grass from bending properly.
-
Skipping regular mowing – weakens the stripes over time.
Many of these common mistakes, such as uneven mowing or inconsistent maintenance, are expertly avoided with autonomous solutions like Yarbo. Its precision mowing capabilities ensure uniform cuts, and its app-controlled scheduling helps maintain regular mowing frequency, preventing stripe weakening and ensuring overall grass health.
Best Time to Stripe Your Lawn
Maintaining Your Striped Lawn
Why Choose Yarbo for Perfect Lawn Stripes?
Yarbo's autonomous yard robots make lawn striping effortless:
-
Precision mowing with straight-line memory
-
App control to schedule mowing and direction
-
Modular striping kit options for advanced customization
Designed specifically for large and complex yards, Yarbo makes achieving perfect lawn stripes effortless, transforming your property into a professional-grade landscape while giving you back your valuable time.
Conclusion
Lawn striping is one of the easiest ways to transform your yard into a clean, professional-looking landscape and using a quality
lawn striping kit makes the process even simpler.
With the right mower, proper cutting height, and consistent mowing pattern, you can create sharp, long-lasting stripes that elevate your lawn’s overall appearance.
Follow this step-by-step guide, avoid common mistakes, and enjoy a beautifully striped lawn that looks like it belongs on a golf course.
FAQs
1. How long do lawn stripes last?
Stripes typically last 4–7 days, depending on how fast your grass grows and how often you mow.
2. Can I stripe my lawn with any mower?
Yes, but for the clearest, most professional stripes with minimal effort, especially on large or complex lawns, a mower with a dedicated striping kit or roller is ideal. Yarbo's Lawn Mower Module, combined with its advanced navigation and modular striping options, is specifically designed to deliver superior striping results autonomously.
3. What’s the easiest pattern for beginners?
Straight-line stripes are easiest to start with and require minimal planning.
4. Can I stripe a lawn without a roller?
Yes! You can use a push broom or create a DIY roller for a similar effect.
5. Will striping harm my lawn?
Not at all—as long as mowing and rolling are done correctly on healthy grass.
 Skip to content